![]()
![]()
| MLS Photography for Real Estate Agents |
|
| Navigate: / home / site map / tutorial / | |
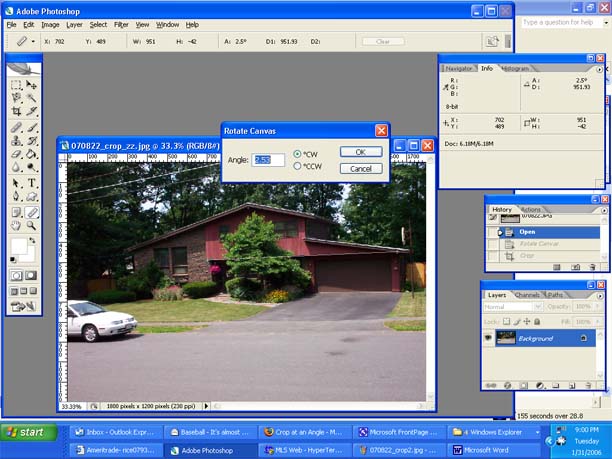
Photoshop Screen ShotCrop at an AngleThis is a good example of the power of Photoshop crop. I started out using crop at an angle, but I have since found a better way to straighten out a picture. This technique is explained in the Sams Book - Teach Yourself Adobe Photoshop CS in 24 Hours by Carla Rose - chapter 4 page 64 - straightening the horizon. This book is available at the Aurora Public Library - 006.6869 Ros. The original photo is not level, but this is corrected in the dark room with the power (magic) of Photoshop image rotate and crop. It looks crooked at the start. With the info palette visible, I use the measure tool (grouped with the eyedropper in the toolbox). I click at the left edge of the part I want level, and then again on the right edge. If you look close you can see the line above the garage. The info palette (upper right portion of the screen) shows the angle is 2.5 degrees. Next I select: Image/Rotate Canvas/Arbitrary and the needed correction of 2.53 degrees CW (clockwise) is automatically entered. I click "OK"
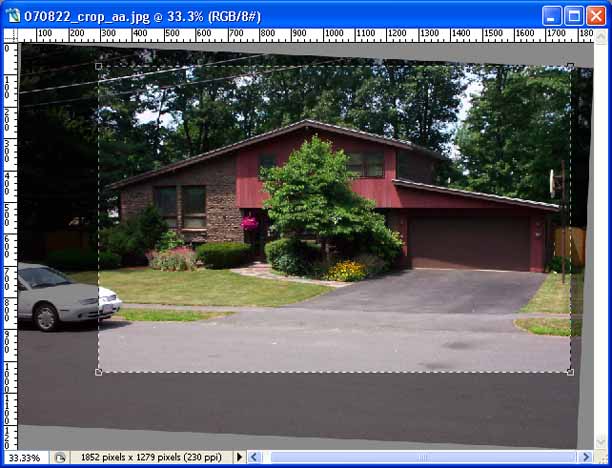
and butta bing butta boom the picture is tipped at 2.53 degrees which makes the house level. I crop using 448 x 290 pixel aspect ratio.
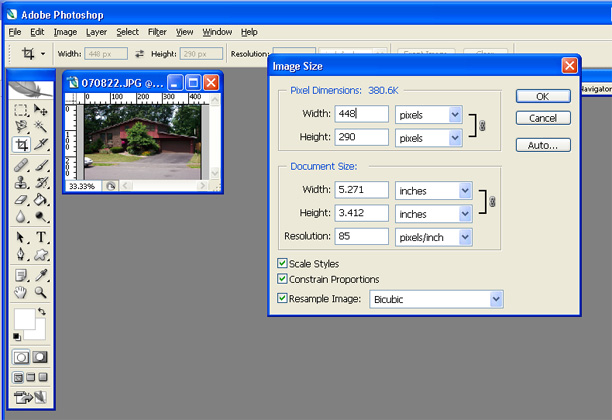
Notice the upper right corner of the crop is as far up as I can go. For artistic reasons I want to cut away the street and leave as much sky (tree tops) as possible. After the crop, I resize the image. I make sure resample and constrain proportions are both checked, set resolution to 85 and then width to 448 pixels, as shown in the screen shot below:
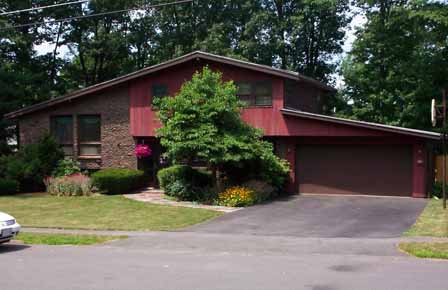
Finally, I save the file at low quality. The end result is a file that is 448 x 290 pixels at 50 KB. End result:
An MLS photograph that would make the homeowner, buyer, and listing agent proud. This image is shown at 448 x 290 - the same as the file size.
|
|
Navigate: / home / site map / tutorial / |
|
|
|
|


